
The Brain Song reactivates this hidden power using soundwave technology. Just listen 7 minutes a day and feel the difference.
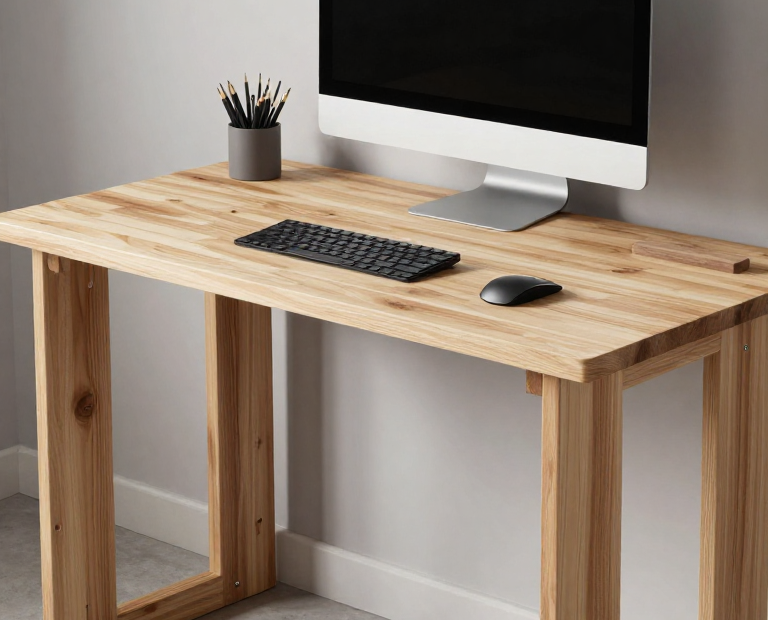
Designing Your Own Computer Desk Plans in Woodworking
Are you ready to create your very own computer desk? Designing your own computer desk plans can be a fun and rewarding woodworking project. Not only will you have a unique piece that suits your style, but you can also ensure it meets your specific needs for comfort and functionality. In this guide, we’ll explore how to get started, what materials to consider, and tips for designing a desk that you will love.
Start with a Clear Design Concept
The first step in planning your computer desk is to determine your needs. Think about what you will use your desk for. Is it for gaming, working, or perhaps a hobby? Here are some questions to help you outline your design:
The Brain Song reactivates this hidden power using soundwave technology. Just listen 7 minutes a day and feel the difference.
Get 16,000 Woodworking Plans Now
- What is your primary use for the desk?
- How much space do you have available?
- Do you prefer a standing desk, sitting desk, or a combination?
- What materials do you want to use?
- Will you need storage space for your items?
Once you’ve answered these questions, sketch a rough idea of what your desk will look like. Keep the design simple at first. You can refine it as you go along.
Choosing Materials for Your Desk
The materials you select will influence both the look and durability of your desk. Here are some popular options:
Get 16,000 Woodworking Plans Now
- Wood: Popular choices include oak, pine, and maple. Wood offers strength and a classic look.
- MDF or Plywood: These are affordable options and great for a sleek finish.
- Metal: metal can add a modern touch and sturdiness.
- Glass: For a contemporary feel, glass can add elegance but requires careful handling.
Be sure to consider how the material will pair with your home décor and the overall durability required for your daily use.
Designing the Desk Layout
Now that you have a concept and materials, it’s time to create a design layout. Here are some factors to consider:
Get 16,000 Woodworking Plans Now
- Dimensions: Measure the space where the desk will go. Make sure to account for height and width so that you don’t create something too large or too small.
- Ergonomics: Factor in your comfort by designing an ergonomic height for your chair and computer. This will help prevent strain on your back and neck.
- Storage: Think about how much storage you need. Shelves, drawers, or dedicated cable management can enhance functionality.
Sketch out the layout based on these considerations. You can create multiple versions to see what looks best before settling on a final design.
Creating Your Desk Plans
With your layout complete, it’s time to put your plans into a more detailed design. Here’s how you can go about it:
Get 16,000 Woodworking Plans Now
- Detailed Drawings: Create a detailed drawing with all dimensions. You can use software for precision, or go traditional with graph paper.
- Material List: Make a list of all materials you will need, including tools required for assembly.
- Step-by-Step Instructions: Outline step-by-step directions to guide you through the building process.
This planning stage is crucial. Make sure your plans are clear and easy to follow.
Building Your Computer Desk
It’s time for the fun part—building! Gather your tools and materials, and start your woodworking project. Here are some tips to keep in mind:
Get 16,000 Woodworking Plans Now
- Take your time and don’t rush the process. Precision is key to a successful build.
- Follow your plans closely, but be flexible to make adjustments if needed.
- Safety first! Always wear protective gear when using power tools.
After completing your desk, consider finishing touches such as sanding, painting, or staining your wood to give it a polished look.
By following these steps for your computer desk plans, you can create a stunning piece of furniture that combines personal style with functionality. Enjoy the satisfaction of customizing your workspace to perfectly fit your needs.
Essential Tools and Techniques for Building a Computer Desk
Building your own computer desk can be a rewarding project that enhances your workspace and allows you to customize it to fit your needs. To embark on this woodworking journey, you’ll need certain tools and techniques to ensure a successful outcome. Understanding what tools are essential and how to use them effectively will help you create a solid, functional, and attractive desk.
Essential Tools for Building a Computer Desk
Before you start your woodworking project, gather the right tools. Here are the must-have items for building a computer desk:
- Measuring Tape: A reliable measuring tape is crucial for accurate dimensions. Measure twice, cut once!
- Square: A carpenter’s square ensures your corners are square, helping create a stable and level desk.
- Circular Saw: This power tool is perfect for straight cuts on plywood or solid wood. Invest in a good blade for smooth finishes.
- Miter Saw: A miter saw is useful for making angled cuts, which may be needed for desk legs or decorative edges.
- Drill and Drill Bits: A cordless drill is necessary for drilling holes and driving screws, making assembly quick and easy.
- Screwdriver Set: You’ll need a variety of screwdrivers for securing components and any adjustments.
- Sander: A sander will help you smooth surfaces and edges for a polished look.
- Clamps: These are essential for holding pieces together while you work, especially during glue drying or assembly.
- Router: A router can be used to add decorative edges to your desk and create hollow spaces for cable management.
Techniques for Building Your Computer Desk
Once you have your tools ready, knowing the proper techniques is vital for an effective build. Follow these steps to get started:
Planning Your Design
Begin by sketching your desk design. Consider your work habits, how much space you need for equipment, and what style you prefer. Create a list of materials based on your design, making sure to factor in the dimensions of the workspace where you will place the desk.
Preparation of Materials
Select high-quality wood, such as plywood or solid hardwood, depending on your budget and skill level. Cut all pieces according to your design specifications. Make sure to sand all edges and surfaces to avoid splinters later. Proper preparation is key to a finished product that looks and feels professional.
Assembly Techniques
Start by assembling the main structure of your desk:
- Frame Building: Create the support frame using strong joints. Use wood glue and screws for durability.
- Attach the Surface: Secure your desk surface to the frame with screws, ensuring a flush and level top.
- Add Legs: Attach the legs firmly. You may opt for bracket supports for added sturdiness.
Finishing Touches
After your desk is assembled, it’s time for the finish. Choose a stain or paint that suits your style and protects the wood. Apply multiple coats of finish, allowing sufficient drying time in between. Don’t forget to sand lightly between coats for a smooth surface. consider the use of protective pads on the table legs to avoid scratching your floor.
Building a computer desk can initially seem daunting, but with the right tools and techniques, it becomes an enjoyable project. Not only will you have a customized workspace, but you’ll also gain woodworking skills that may lead to future projects. Enjoy the process, embrace your creativity, and take pride in your DIY computer desk!
Conclusion
Creating your own computer desk through woodworking is a rewarding venture that allows you to blend functionality with personal style. By designing your own plans, you have complete control over the size, shape, and features that best suit your needs. Whether you prefer a simple, minimalist desk or a more elaborate design with added storage, starting from scratch means you can tailor the desk to fit your workspace perfectly.
The tools and techniques required for this project may seem intimidating at first, but with a little patience and practice, you can master them. Essential tools such as a saw, drill, and sander, along with techniques like measuring accurately and joining pieces effectively, are vital in bringing your vision to life. Don’t forget about safety measures as you work; wearing protective gear and understanding the tools will ensure a smooth building process.
As you embark on this woodworking journey, let creativity and personal expression guide you. Every cut and joint is an opportunity to learn and grow in your skills. So gather your materials, prepare your workspace, and take that first step toward crafting a one-of-a-kind computer desk. Not only will you end up with a beautiful piece of furniture, but you will also gain a deeper appreciation for the craft of woodworking as you tackle each challenge along the way. Happy building!